Category Archives: Craft Cleanse

Craft Demon

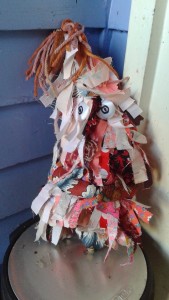
Fabrica the scrappy fabric demon

Fabrica the scrappy fabric demon

One of the assignments for the Craft Cleanse Class is to draw out our craft demon.

Your mission today, should you choose to accept it, is to silence your inner demon by giving it a face. Put your inner demon on paper. You can sketch, paint, collage, or just write about whatever it is inside you that drives you to keep on buying things you don’t really need. Journal it out!

I decided right away that she needed to be a fabric doll, not a journal page. But I wasn’t ready to make her until I got the fabric area of the studio organized.

I finally made my craft demon. She is a messy little girl. She has crazy eyes that are mostly hidden by her scrappy fur made of shreaded scrap fabric. They prevent her from making good choices at the fabric store. If it is on sale it is a good fabric. She strangely likes girly fabrics, (even though I don’t) and buys them even when she has no projects for them. She has velcro hands that pick up everything. She seems to think that grab bags of fabric at the thrift store are potential treasure chests. She never puts away her supplies, she throws garbage, thread and junk on the floor. Her name is Fabrica.

Travel Art Supply Folio

Art supply travel folio

Art supply travel folio

When I travel, I like to take some art supplies in the theory that I will do some journalling. Back in the Artfest days this did happen. But 2011 was the last one of those. ::sad face::

Because of the craft cleanse, my fiber area was tidy enough to make a project! I decided it would be cool to make a supply kit to take my art supplies with me, instead of the gallon zip lock bags I was hauling them around in. The other inspiration for this plan was the Schools for Art Leaders trip later this month. It is an “unplugged” trip where we will be visual journalling for assignments.

I looked online and found some ideas, patterns and images of examples. But none of them really matched my needs. I needed something to hold collage papers, pens, pencils, scissors, glue, etc. Most of the examples just held writing tools.
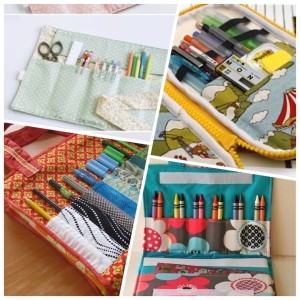
Inspiration Examples of Art sSupply Folios

Inspiration Examples of Art Supply Folios

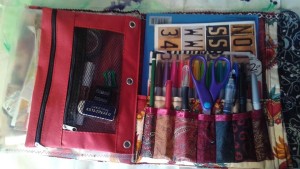
So I had to just make it up as I went along. It’s base is like a fabric file folder with inside pocket on each side. Then in the center I sewed in a pencil pouch for glues and such and a clear plastic envelope for papers.   I sewed some small pockets for individual pens and the cut down and sewed another clear plastic pocket to hold the colored pencils. Finally I had to make a flap for a closure, but I am still deciding if I want to use a velcro or ribbon keep it closed. Leaning towards the ribbon for size flexibility.

Once it was made, I needed to decided which supplies to fill it with! So time to finally test my supplies. (One of the assignments of craft cleanse is to make test sheets of all your pens/inks etc.) I dumped out my zip lock bags and started testing. I was sad to discover 4 years of disuse had ruined many of my supplies. The pens were dried out, the oil pastels had melted into a blobby mess. On the plus side, I guess AFTER the craft cleanse I will get to buy some new supplies. 🙂
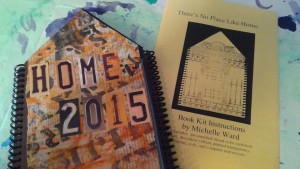
House Journal

House Journal

I also ran across this book kit that is probably 7 years old. (Turns out I got it in 2002! http://michelleward.typepad.com/michelleward/home-improvement.html)  It was stiill sitting in the package, never made. I decided to finally build it and use it to record some of the house improvements that we are doing this year.

I was exciting to be making stuff! It has also felt great to just PURGE! Tossing things that are too old, no useable and donating stuff I have never and will never use. Three hours flew by in the studio today!
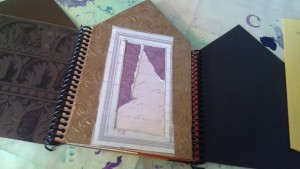
House Journal
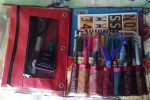
House Journal

Mission Complete

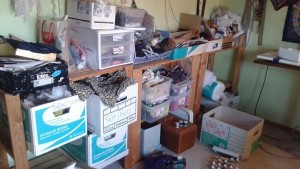
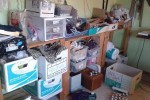
The Messy "before" picture

The Messy “before” picture

So the fiber area is 90% organized. The only things left are the large bins of fabrics that are 3 or more yards. The are in the closet and are Too large to put in my little bins. I will have to wait till I move downstairs before I decide where and how I want to fold and store those. Plus there is a box of patterns I need to sort thru.

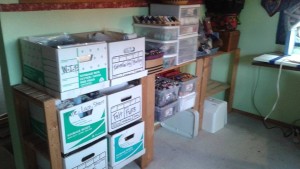
The cleaned "after" picture

The cleaned “after” picture

I am so pleased with my progress. Notice the empty shelf areas! I purged a lot of stuff. Several bags are ready to go to the thrift store and two full garbage bags are just gone!

I did discover that a couple of my small scrap drawers smelled mildewy. This was my own fault. I often leave the windows open up there, pretty much all summer.  But it is Seattle and it rains… So obviously these plastic containers, which are right by the windows, were getting rain and then keeping the damp fabrics closed up tight in this plastic bin. Hence mildew. The nice big pieces of fabric that smell, I will wash with some vinegar and try to get rid of the smell. A bunch of scraps I just tossed, not worth trying to clean. This won’t be an issue anymore after the move downstairs.

Project in progress

Project in progress

I got it cleaned up enough that I decided to make a project. I am making a visual journalling travel supply kit. I need to figure out a way to best fit my favorite pencils, pens, papers and collage tools. I found a few blog posts online that made similar things, but I don’t like following patterns, and nothing was just right, so I am just making up as I go along.

I do still need to finish organizing the paper area then the computer area.

Ribbon and Trim and Lace, Oh My!

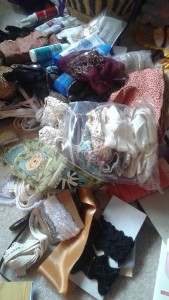
Next up on the sorting chopping block is the trims and notions. I started with sorting and organizing thread, needles and sewing supplies. I got all of that settled and moved on to the trims. I had several shoe boxes, plastic bags and random bins filled with trim, ribbon, laces and other junk!

A small fraction of dumped out trims, ready for sorting.

A small fraction of dumped out trims, ready for sorting.

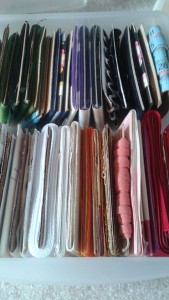
Then I cut a bunch of chunks cardboard that is standard size for rickrack and binding. Bonus they fit perfectly into a set of plastic drawers that weren’t being optimally utilized. Sitting for a while, winding trims into the boards was almost meditative. Plus I got to see a ton of trims that I didn’t even know I had.

Finished trim organized by color.

Finished trim organized by color.

I also got rid of several patterns I will never make, unfinished projects I don’t care about anymore and a bunch of ratty, old trims that I will never use. Still lots to do, but making progress.

On To the Fiber

While I am not actually done with the paper area, in my true ADD cleaning fashion I have moved on to the fiber area.

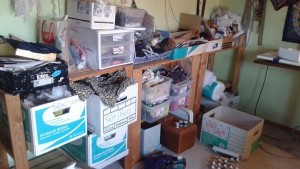
The Disorganized fiber shelves of Doom.

The Disorganized fiber shelves of Doom.

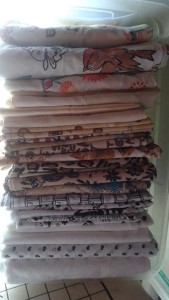
I watched a couple of great videos on how to fold fabrics… While it isn’t rocket science, there are some tips and tricks to make your fabrics fit neatly. So inspired by some of these videos, I dumped my bins of small novelty fabric pieces out and got to folding. There are pieces that range from fat quarter to a yard or maybe two. I cut a chunk of cardboard that would make a fold to fit back into the clear larger shoebox tubs I was using. Then I folded and sorted away the hours. I resisted tthe urge to iron everthing. It was too hot to do that and would have added hours to the process.

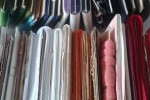
A finished bin of folded fabric.

A finished bin of folded fabric.

I still have some bigger bins of larger pieces of fabric, and then the scrap drawers to deal with before -just- the fabric will be done. But the small progress I have made feels really good. I ditched a bunch of fabrics that I know I will never use.  I took pictures of a bunch of fabrics that I really like and need to come up with projects to use. Still so much to do, but making progress.


Clean and Purge

To prepare for moving my studio out of the attic, I am spending some time purging and organizing my supplies.

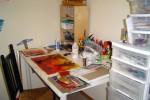
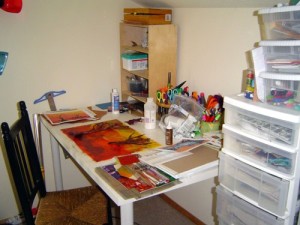
Monday I worked on the paper area. This is an old view of that area. But I had several of these plastic drawers and tubs filled with a ton of different types of supplies. Since paper collage is now my main medium any more, My goal is to reduce this down to one set of 7 drawers.

image


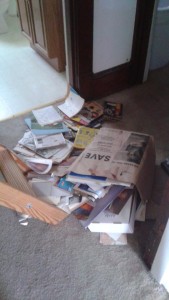
I was brutal with my culling. I have so many old weird trift store magazines and books that I thought I would use for collage… But now they aren’t really to my taste anymore. They are too ratty to donate, so they went into the paper recycling.

image


2015 The Big Summer Project

Well, this blog has been dormant for YEARS! As has my artwork. This is the summer to change that!

Basement room in progress

Basement room in progress

I haven’t made artwork in years and part of that is because my studio space has not been easy to use. The attic has been problematic for a number of reasons: too hot or too cold, depending on the season; only access is by ladder which my knees can’t handle anymore; and the dogs hate it when I am up there. So not that our basement roommate has moved on we are repurposing many of the rooms. Along with that a deep clean and repainting as things are moved around.

I already finished painting and cleaning the basement room. Next we move Shawn’s books and computer down there. Then I will temporarily move the bedroom to the spare room to allow for cleaning and painting of the bedroom. Next I will do the same for the living room. Finally, I will paint and clean the spare room and move my studio from the attic.

Part of the studio move will require new furniture, including a fabric cutting island. I will also sort and pare down supplies to focus on fiber arts. I am hopeful and excited that the new studio arrangement will allow me to work more often and more easily on my art.

As part of this, I am taking an online class called “craft cleanse” which has assignments geared towards clulling and sorting supplies to make your studio space more usable. I plan to blog as I go along with these assignments and to show the progress on the overall project.

Meanwhile I am pinning lots of ideas on Pinterest.  http://pinterest.com/shebaduhkitty/studio-remodel-2015/