Category Archives: Passions

Playing Favorites: fields of dreams

Creating a gallery of my favorites has been quite fun. Looking through my own work over the years and fitting these themes has really shown me the diversity of my own work. Next up is Playing Favorites: fields of dreams, which I think can be translated to work that shows nature or landscapes of some type. Of course when he put together this series of posts, I think he gathered a lot of art from a lot of different people then put them into these catagories. I don’t think he expected to have an individual artist find art to fit each theme. But I like the challenge, so I plug along here.

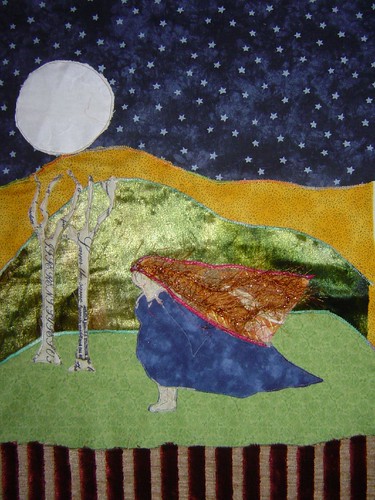
Earthfin Rip July 2006

Media:  Fabric Collage Dimensions:  14″ x 14″ Date of Work:  07/2006

Night Sky Wanderer is a RIP for the EBSQ 2006 Ripped Off Show. It is inspired by a pyrography called Workin’ On Wings to Fly by Lisa J. Rough. I was really drawn to the powerful woman and the birch trees. It has a sense of strength and peace. I tried to capture that same feeling in my version of it. This piece is all fabric collage using applique’ and quilting techniques. It is embellished with buttons, ribbon, trim, beads and handmade yarn.
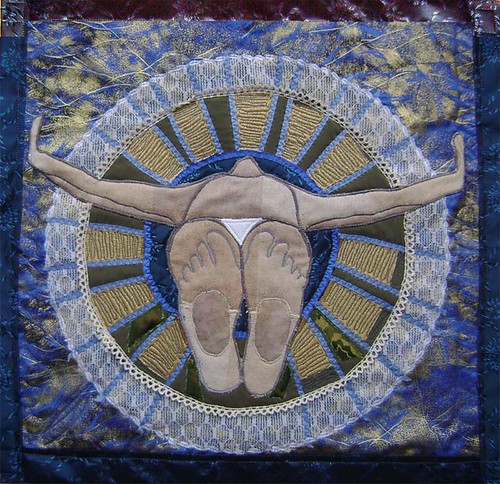
Jesus Christ Pose

Jesus Christ Pose, originally uploaded by Charger’s Mommy.

Media:  fabric collage
Dimensions:
  22″x22″
Date of Work:
  07/2008

This is created for the EBSQ Annual Ripped Show 2008. I have been doing a lot of mandala-like art recently, so I was drawn to Tina’s “Dali and the Eye of God” piece. I translated it into fabric applique. It is quilted and embellished with lace, ribbon and a variety of fabrics including silk, cotton, and rayon. I named it after a soundgarden song that kept going though my head whenever I would work on it. Starting August 1st you can vote for your favorites at EBSQ. 

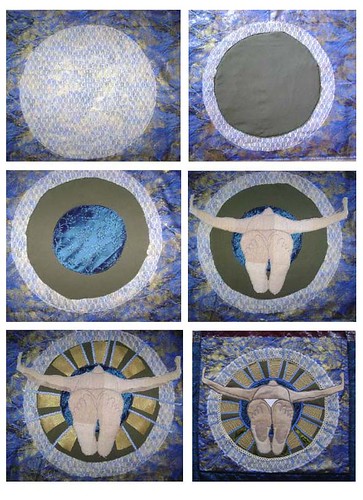
christlikeposeWIP
Here is a little Work in Progress Step-by-step snapshot. I still need to finish a bit of quilting and make the hanging tabs…but my machine decided to go AWOL on me, so I will be running it into the shop tomorrow.

This piece did double challenge duty. In addition to being for the EBSQ ripped show it is one of my 5 mandalas for Jen’s July Challenge. This one will be for the Aether/void/spirit/heavens catagory, since it is spirtual in nature.

What I did on my Summer Vacation


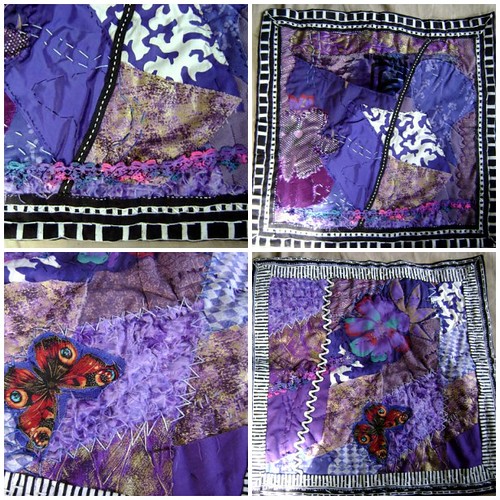
purple doll quilt, originally uploaded by Charger’s Mommy.

My youngest neice loves the baby crib quilt I made for her when she was born and she loves purple as much as me. I thought she would enjoy making a doll quilt with me. I had her pick and layout fabric scraps. Then I spent most of the vacation hand sewing the mini quilt. I hope she enjoys it.

Art/Not Terminal and Art Communities

1994antthrong.jpg
(photo from my first solo show at A/NT in 1994…
girl in red dress in the center is me.)

This funky artist run gallery gave me my start in the art world. It was the first place I showed my work and the first place I sold work, even my first solo show. It continues to amaze me that it is still running. I know if I lived closer I would still participate. I was treasurer and even president of the board for a few years. I was also the gallery zine editor and publisher for a few years. It was and is still a great community that is eclectic and supportive of newcomers. It rarely gets any press so I was excited to hear that it got some nice props from the Seattle PI this week.. even if it is just in their blog. (after all blogs really are where the real news is these days.)

Artist communities are a great way to get support. These days there are many online communities (like EBSQ) but they can never completely take the place of face to face communities. My friend Amy participates in one closer to me… one in which I keep telling myself that I need to get involved.

In what artist communities do you participate? Online or face to face, which do you prefer?

Challenge #15

This is a work in progress of a WATER mandala for Stretch Yourself Challenge #15 for July 2008. The challenge is to create works of art the represent the five elements; earth, wind/air, fire, water and Aether/the void. Since the five elements are a spiritual guide, I felt that representing them in mandala style was fitting.

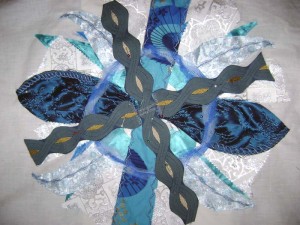
So far this piece is comprised of recycled party and prom dresses, a silk kimono, carpet samples and a plain white sheet. All of the dress fabric is some kind of recycled scrap that I received from my late Aunt Minnie. I still have some sequined dress that I am trying to work in and I need way more blue. Going with swirls and curls to get a wave/water type feeling. I am also trying to really incorporate texture with the unusual combination and layering of the fabrics. I believe this might become a tote bag to take to the pool for my swim sessions.

I will share more when it is finished. And the other elements as they are created this month. Still working on techniques from my Fiber arts book too.

Walk on This?

Floor Cloth

My final day of ArtFest 2008 was Judy Wise’s floor cloth class. It was not a first choice (I wanted the waxy layers one).  I was pretty envious of what I saw coming out of some of the classes that had been my top choices. Plus the room was tiny and therefore SO crowded that it was just uncomfortable. Here we were painting large canvases and the table space we each had was barely the size of our canvas. We had to watch out for paints and elbows, while storing most of our supplies on the floor. I held my paint palette in my hand most of the time, which was tiring, something I am not used to at all. Despite what could have been a horribly bad day… I got into the right head space, adapted for my needs in order to enjoy the time to paint. Of course I injected collage elements… it is impossible for paper to stay OUT of my work.

Judy went over some hints about prepping your canvas to be a floor cloth. She gave out a lovely color pamphlet and showed us a bunch of her canvases. Then we got right to work. I know I was tired and overstimulated at this point in the retreat, but I don’t feel that I really learned anything new in this class.  I only spent a few hours on this before it felt finished, and I was FINISHED. I cleaned up early and went back to nap. Since I haven’t painted in this size before, I was actually impressed with my final project. This piece started my ideas for my current series about journeys.

I won’t be walking on this! I do have a bunch of unstretched canvas that might someday become a floor cloth. For now this one will be named “Girl Traveller

Who’s Your Dada?

SMdsc04095

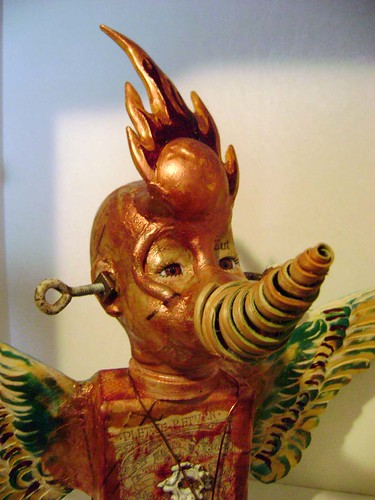
My first class at Artfest 2008 was Opie and Linda Obrien for Who’s your Dada Dolls. We all received the same head and block for a body, but it is amazing the different things that came out of that class. I find that incredibly fascinating, the different ways to solve the same problem that can come from a group of very creative people. (Here are some examples from show and tell night) I was also amazed at how little Jen brought with her… I had tons of stuff! but her work was amazing none-the-less. I kept offering her some of my junk… but apparently she likes a challenge.

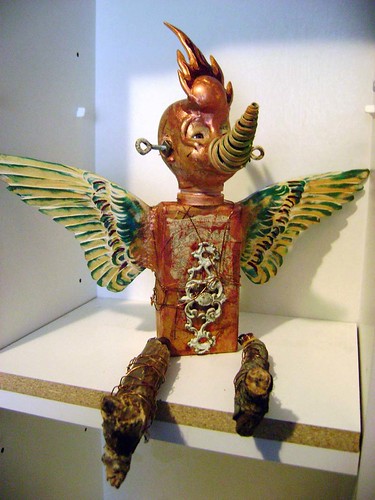
Opie and Linda are a hoot and I learned some VERY cool things about apoxie sculpt. A material that I had never heard of let alone tried. On my first piece, I really only used the apoxie as an attachment substance. It worked well to connect a plastic comet to the doll head and the heavy wooden wings to the wooden block body. The material takes paint easily and blends in to the sculpture, in addition to being a super way to attach awkward pieces. I would love to explore it more, perhaps. I really want to move beyond mixed media and sculpture in general to focus more on fabric. I do love sculpture so who knows what I will do! I wish I had learned more about wire and sculpture attachments but Opie and Linda had too much desire to do things for their students.

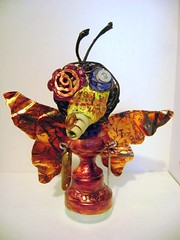
SM100I brought some wings that have been in one of my mixed media drawers for awhile. These went on my body right away. But then I was stuck on how top heavy my piece was turning out. While I pondered this problem, I walked the room to see what other people were creating. Then I worked on some more sculpting material on a second piece, also with wings. I am not much of a clay sculptor, but I was so impressed and inspired with what some other classmates were designing, I had to try something a little more textured and design oriented. This little bug was the results.


 Luckily on the walk back from lunch I found a couple of sticks that looked like they were legs with high heels. Turns out they were the perfect finish to balance out my first piece. I love these two dolls together, so I have named them “Little Boy Bird and Bitsy Bug“ 

SMdsc04096

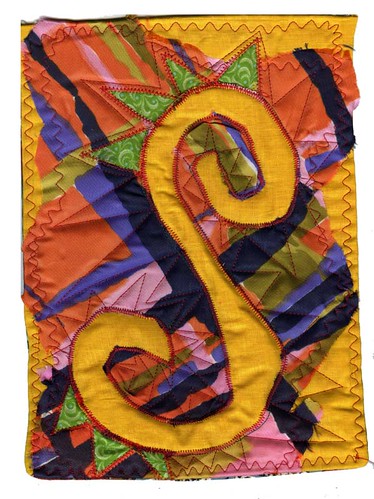
Experiment #4-B Reverse Applique’

Experiment #4-B Reverse Applique

I have done a lot of ‘reverse applique’ in the past 4 years, so this is not a new technique. The book shows a different way to do it than I have been doing in my work. I really should have tried their suggested method. I layer a bunch of fabrics, sew my design and then cut away the top layers that I don’t want and allow the lower layers to show. In this piece the top most fabric is the bright print, with yellows below it and then green below that. The green is actually under the batting. I like the additional depth that this allows. The book shows cutting the holes in the top fabric first, then sewing on the behind fabrics.

I actually really like this one… again all scraps and talk about bright! So many of these fabrics are from a bag of stuff I got from my mom, that she got from storage that was originally from my GREAT Aunt Minnie. So they are from the 40’s-70’s I imagine.

So far, I am having a great time with this challenge and the resulting fabric journal is going to be very cool!

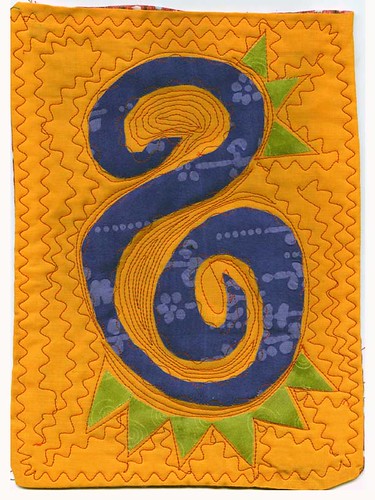
Experiment #4-A Raw Edge Applique’

Experiment #4 Raw Edge Applique

There are several Applique techniques in my challenge book “Exploring Textile Arts“ This is called Raw-Edge because the parts that are appliqued are not finished on the edges in any way. To do this, I used iron on facing to hold down the purple and green applique shapes, then caught the edges on the main piece with a decorative stitch. I did this before adding the batting and doing the quilting. So the additional quilting areas allow the swirl and points to puff up above the rest of the piece.

This happens to be an image I tend to doodle all the time (mostly when sitting through boring meetings) so I picked it for this series of experiments. I plan to do the other 5 types with this same design.. maybe even the same color combos if I can find the right scraps. This fits my 8×10″ book plans. This is very similar to the type of applique I usually do in my collages, but I usually finish the edges with a satin stitch.